1. Base
The Base tab provides essential tools to start creating custom shoe lasts.
A shoe last can be created four ways: from a library last, from a union (a 3D scan combined with a library template), from a 3D scan, or from an imported last or CAD model.
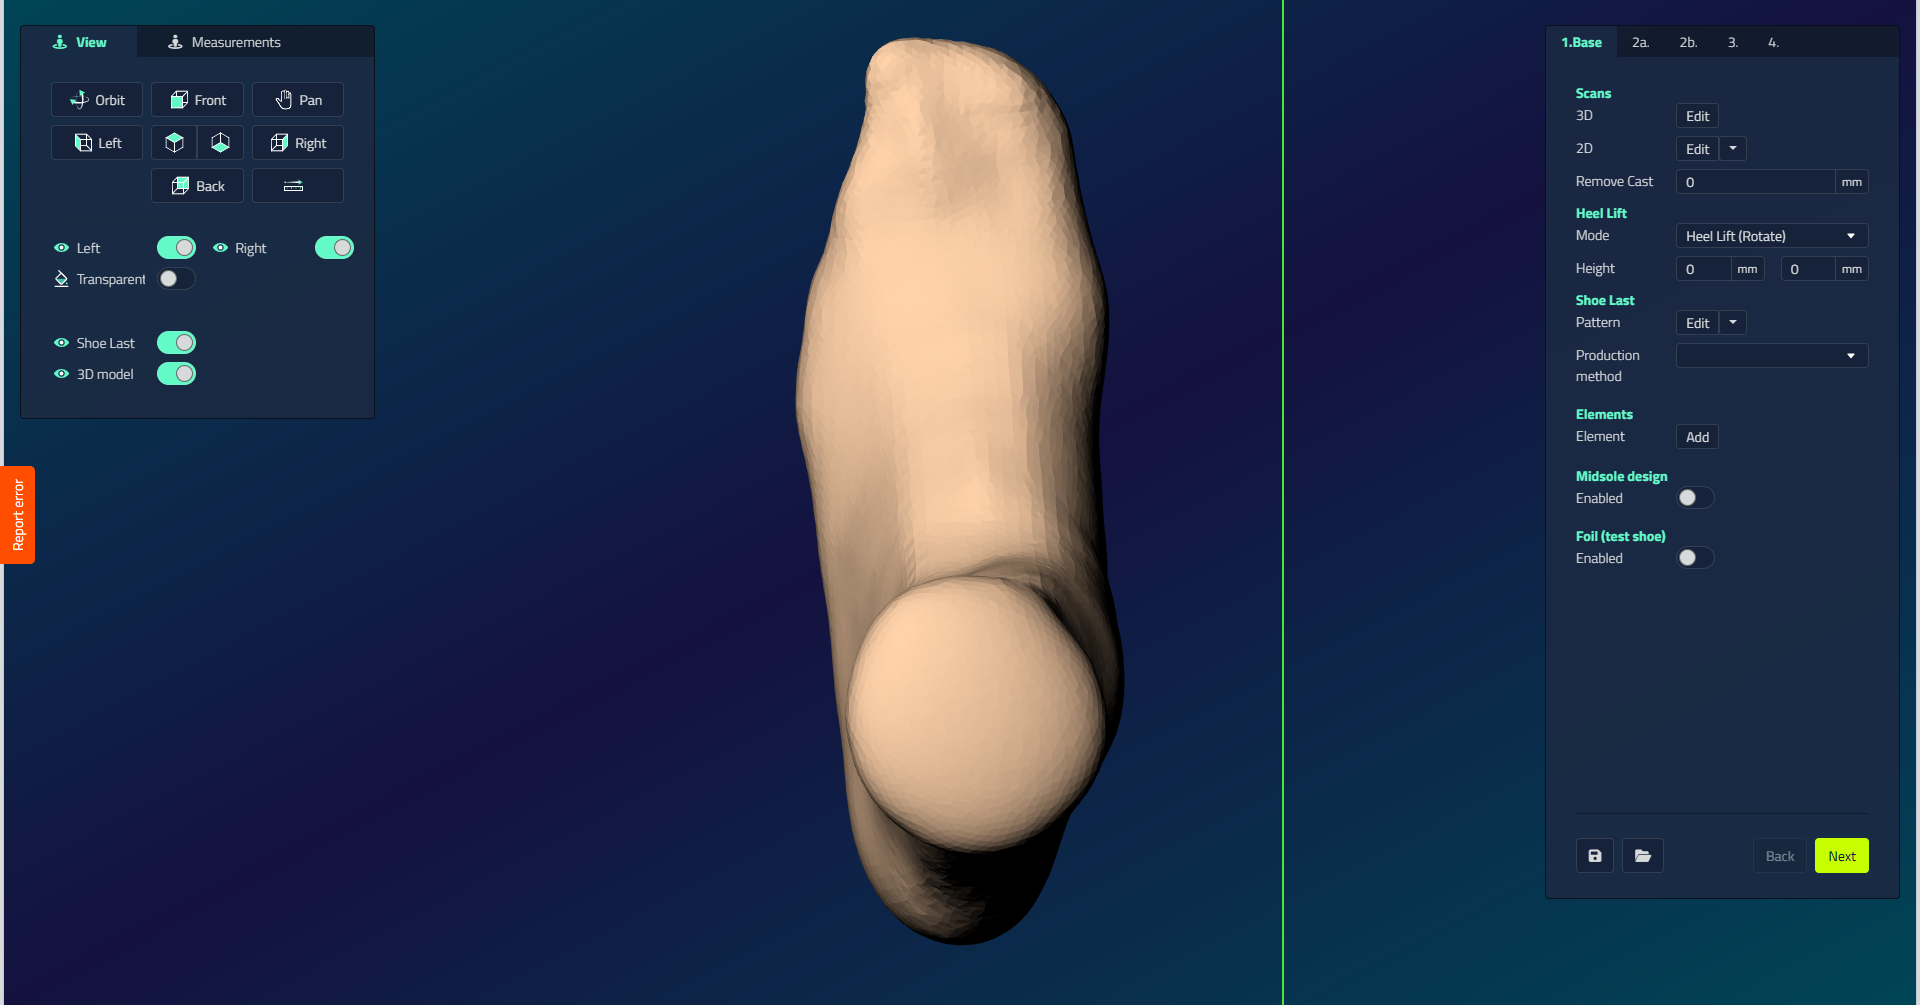
| Control | What it does |
|---|---|
| 3D Scan | Add a 3D scan of the foot, to use as a reference or as the basis for a Union Last. |
| 2D Scan | Add 2D scans, such as a foot outline, to use as design references while shaping the last. |
| Remove Cast | Removes material evenly around the foot by a specified number of millimeters, for example to account for the thickness of a cast or sock used during scanning. Only visible when a 3D scan is added. |
| Heel Lift | Set the required heel lift Height in millimeters. Mode: Rotate rotates the model to the correct heel lift (foot remains unmodified); Correct adjusts the model to the desired heel lift height. |
| Pattern | Select or change the shoe last template. A pop-up shows: Last Library (use and modify library models), Union Last (combine a 3D scan with a library template, applying the library model's toebox and featherline to the scan), Select 3D scan (import existing shoe lasts from project), Import (import external shoe last models). A dropdown next to the button lets you pick a different model for the left or right side separately, once you have made an initial choice. |
| Union Level | Only visible with a Union Last. Sets how much the last automatically adapts to the 3D scan: None (no adaptation), Ball (match the last to the ball of the foot only), Full Scan (wrap the featherline around the heel and make the medial underside total contact with the scan), Ignore Plantar Side (same as Full Scan, but keep the template's plantar profile), Toebox only (no featherline; adapt only the toe). |
| Forefoot Transition | Checkbox. Adjusts the transition in the forefoot. Only visible with a Union Last. |
| Low cut last | Checkbox. Prepares the 3D scan optimally for a low-cut last. Requires Union Level set to Ignore Plantar Side. Only visible with a Union Last. |
| Production method | Milling: Last (export as STL), 3D print: Last (print in hard material with customizable settings and optional dovetail split), 3D print: Last shell (print upside down with tapered support for PU foam filling). Production method doesn't limit midsole export: with midsoles enabled, any of these methods can produce a gross last, the last fused with its midsole as one piece, see Shoe last design - Gross on the Export step. |
| Elements | Add components to your design: Elements (remove material for a pad/post), Sinks (add material for a pressure relief area). |
| Midsole Design | See the Midsoles section for detailed options and settings. |
The Element picker
Adding an element or sink opens a picker with the shapes you can place.
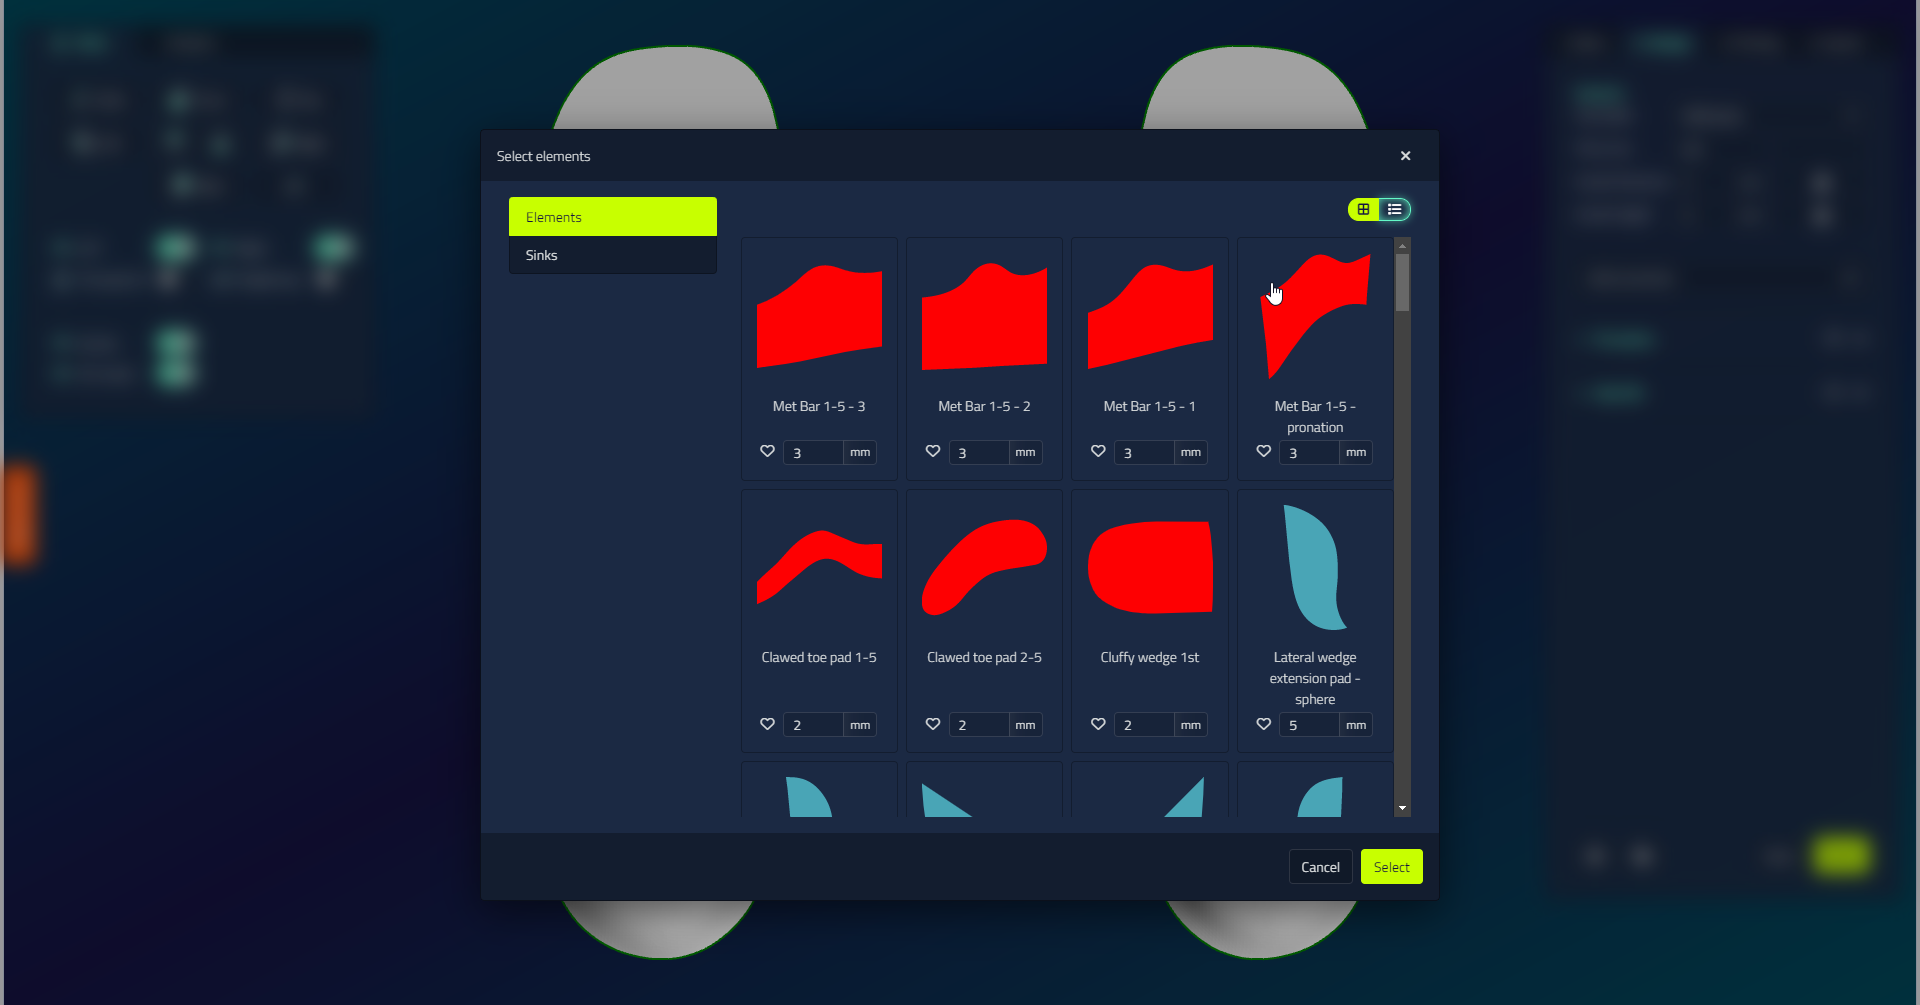
| Option | What it does |
|---|---|
| Element / Sink toggle | Switches between raised features (pads and posts) and depressions cut into the surface. |
| Favourites | Mark items you use often with the star so they are easy to find. |
| Thickness | Set a thickness in mm per item before you add it. |
| Multi-select | Add several elements at once. |
Foil (test shoe)
Tick Foil (test shoe) on the Base tab to unlock the test shoe products on the Export step. It does not change the shoe last design or add a step to the step bar. For the test shoe options (Net stabilization and printer), what Net and Gross mean, and how a printed test shoe can be reopened as a shoe last, see Test shoes.
Contour object actions
Selecting the shoe last's contour/outline in the viewport adds two extra actions to the action menu. Mirroring the outline to the other side lets you compare the toe box shapes of the two lasts.
| Action | What it does |
|---|---|
| Mirror contour | Mirrors the outline to the other side. |
| Mirror contour side view | Mirrors the outline in the side view. |
The outline object otherwise only offers Delete.