3D Printing
Before you can 3D print a model, you set up two things in Settings (Account → Settings → 3D Printer): the Printer & Materials profile that decides how the model is prepared, and the Network printers entry that tells LutraCAD how to reach the machine. This page walks through both, then how you print a product.
Printer & Material profiles
Go to Settings and open the Printer & Materials tab. This is where you enable a printer plus material combination for each product type, and open its settings to fine-tune the print.
A short disclaimer note is shown at the top of the tab. Profiles are provided by LutraCAD and the community, so always check the print result on your own machine before relying on a profile in production.
Choose the product type and technology
Profiles are organised first by product type, then by print technology. Each product has its own document type tab (insole, shoe last, midsole, foil, and the AFO, hand and helmet braces). Pick the tab that matches what you print, then the technology tab for your machine.
| Technology tab | Technology |
|---|---|
| FDM/FFF | Fused deposition / filament printing |
| MJF | Multi Jet Fusion |
| SLS | Selective Laser Sintering |
| SLA | Stereolithography |
On the FDM/FFF tab you can narrow a long printer list with the brand filter dropdown.
Enable a printer and material
Each row is one printer plus material combination. To activate a profile, find the row for your printer and material and click Enable. To tune it, click Settings on the active row (see Printer-profile settings at the bottom of this page). To turn it off again, click Disable. The Verified column shows an icon for where the settings came from (see below).
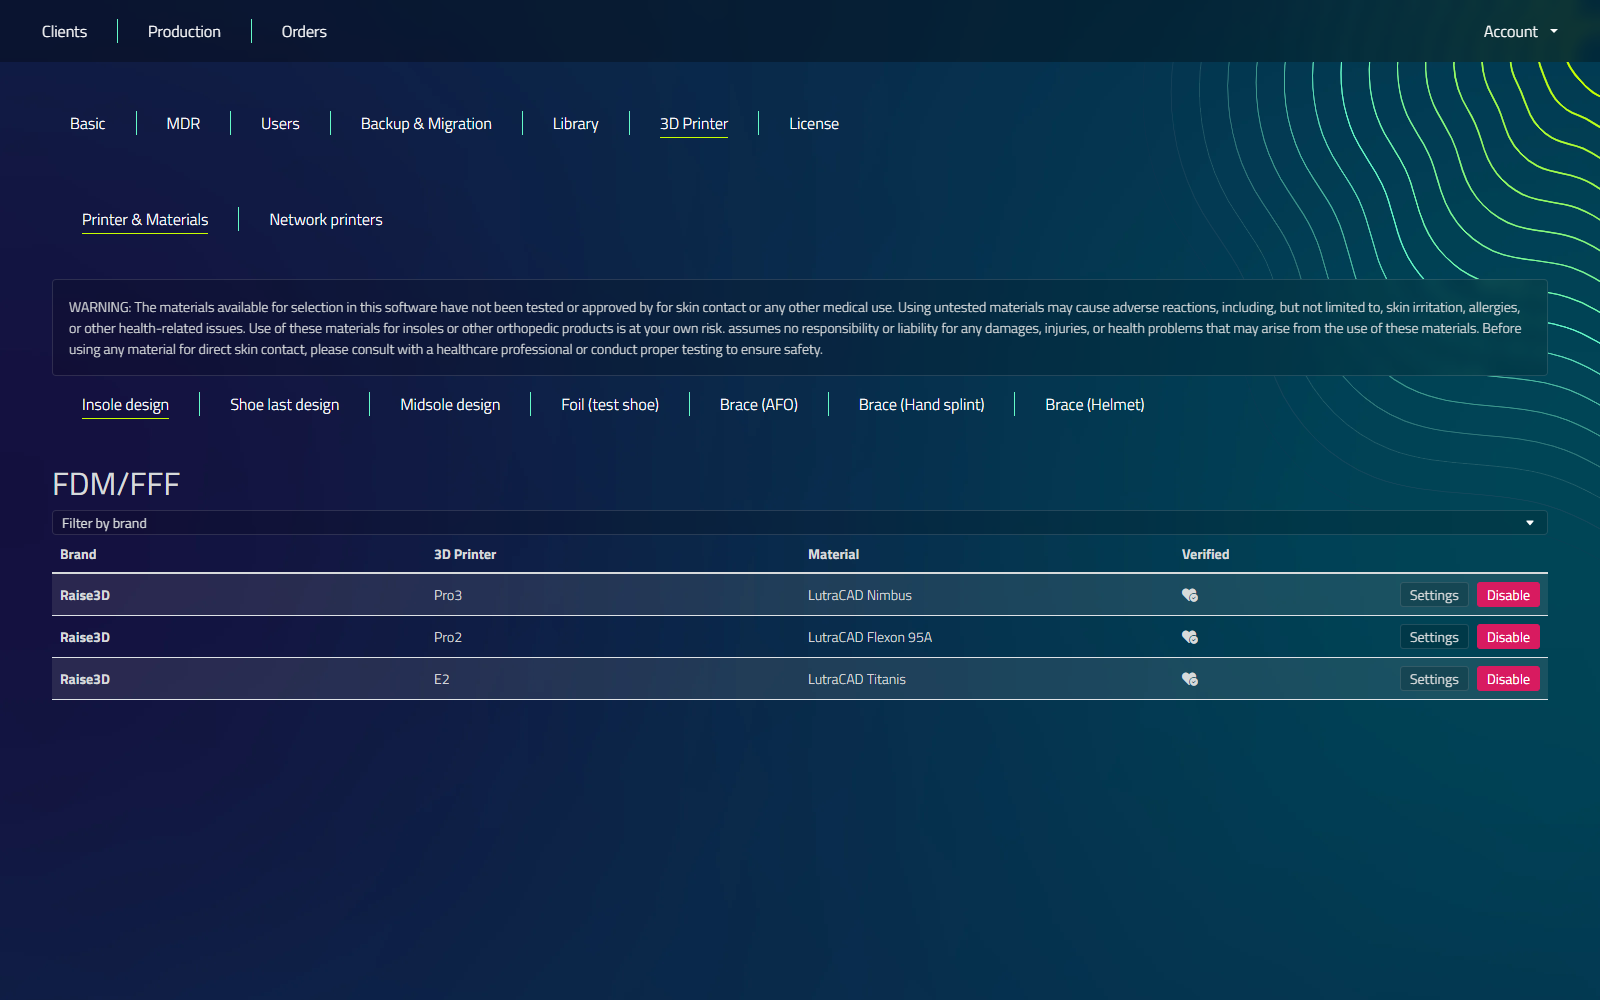
- A heart icon means Verified. LutraCAD has tested this printer and material together and optimised the settings.
- A group-of-people icon means Community contribution. The settings come from the LutraCAD community and have not been tested in-house. They are a useful starting point, but test them on your own machine first.
Network printers
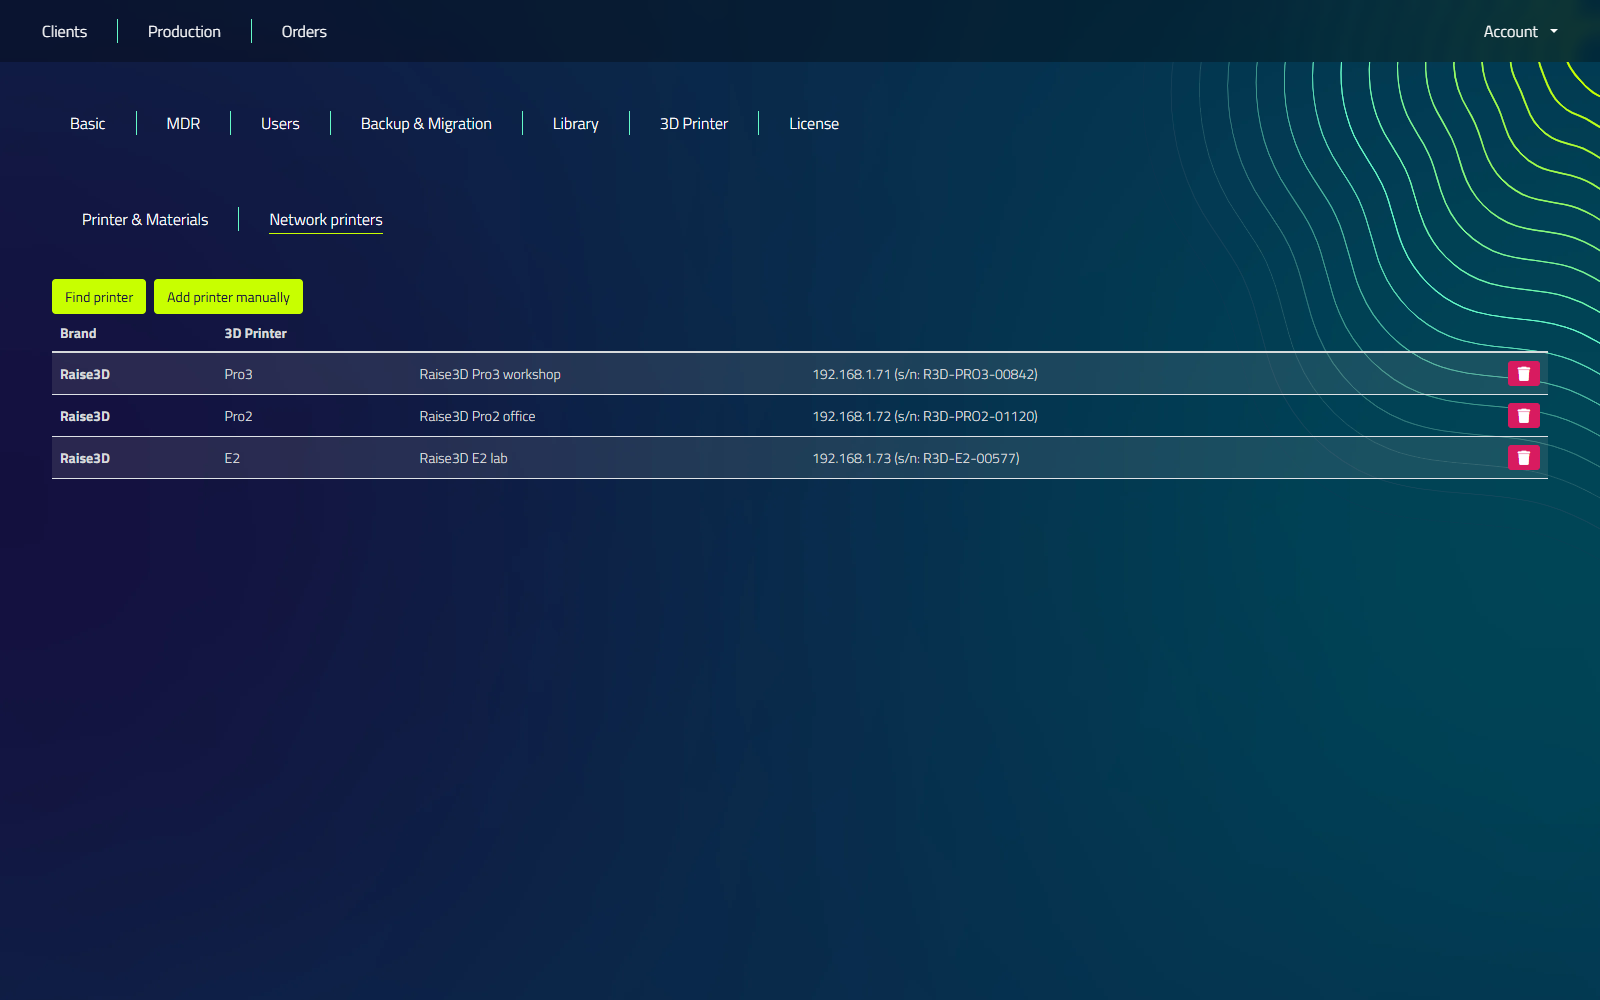
For networked printers, go to Settings and open the Network printers tab. This is where LutraCAD learns how to reach each machine so you can send prints directly.
Add a printer
| Button | What it does |
|---|---|
| Find printer | Scan the local network for compatible printers, then pick one from the results (or fall back to entering an IP address) |
| Add printer manually | Pick a printer type and add it by hand; how you connect depends on the type (see below) |
Connection types
When you use Add printer manually, the way you finish the connection depends on the printer type you choose.
| Printer type | How you connect |
|---|---|
| LutraCAD Print Farm | A browser sign-in opens; sign in to send prints straight to the LutraCAD print farm through your LutraCAD account |
| Other printers | Enter the printer's IP address, then give it a name |
Some printers ask for an API key when you add them (for example certain Bambu Lab models). If it does, enter the key from the printer.
You are not limited to the brands listed above. Any network printer reachable by an IP address can be added with the Other printers option, and printers on your local network can be found automatically with Find printer.
Printing a product
Once a printer profile is enabled and, for networked machines, the printer is added, choose a printing route from the design's Export step to open the printing production. The controls shown depend on the printer brand and technology.
| Control | Function | Shown for |
|---|---|---|
| Printer selector | Change the active printer; shows a read-only summary of the chosen profile (Brand/Type/Material, Nozzle, Extruder, Top/Bottom layers, Adhesion) | FDM printers |
| Send to printer | Slice the design and upload it straight to a network printer | Network printer available |
| Export STL | Save the STL | Solid, shell, and last types |
| Export gcode file | Export a GCode file | FDM printers |
| Send to print farm | Upload the design straight to the LutraCAD Print Farm | LutraCAD Print Farm connected |
When MDR is enabled, each selected production item also has settings for Practitioner, Material, and Cover material.
Printer-profile settings
Click Settings on an active row (under Printer & Materials) to open the profile dialog. Which controls appear depends on the document type, the printer's brand, and the material, so not every control shows for every printer. Click Save to apply the profile, or Close to discard your changes.
The table below is the full set of settings a printer profile can have. The Shown for column says when each one appears.
| Control | What it does | Shown for |
|---|---|---|
| Nozzle diameter | Nozzle size in mm (0.4 / 0.6 / 0.8 / 1.0 / 1.2, per brand) | All profiles |
| Extruder | Which extruder to use, Left or Right | Dual-extruder brands |
| Support material | Print with or without support | Polypropylene material |
| Strategy | Infill strategy: Default or Fluent | Insole |
| Infill | Infill pattern: Default or Gyroid | Insole, shoe last, midsole |
| Per-shore infill | Infill per hardness (Extra soft to Extra hard): a percentage for 3D printing, or a beam thickness in mm for other technologies | Default strategy with a shore-variant material |
| Wall | Wall thickness (mm) | Shoe last |
| Rotate | Rotate the model on the bed | Single product |
| Tilt | Tilt the model on the bed: 0 / 15 / 30 / 45 / 60 | Midsole |
| Top layers | Number of solid top layers | Non-belt printers |
| Bottom layers | Number of solid bottom layers | Non-belt printers |
| Adhesion | Bed adhesion: None or Skirt | Non-belt printers |
| Per pair | Print left and right as a pair | Insole |
| Multi-color print | Print in multiple colors | Dual-extruder brands |
| Production label | Add a printed production-ID label | Belt printers, supported filament |
| Top cover | Add top-cover layers | Belt printers, supported filament |
| Filament sensor | Enable the filament run-out sensor | Belt printers, supported filament |